Understanding and Generating Bitcoin Addresses in Node.js (2023)

In this piece, I’m sharing what I learned while making a multi-chain Cryptocurrency wallet from scratch recently. Since the world of cryptocurrency was new to me, I faced some challenges. I hope my experience makes things easier for you.

Generating a Bitcoin address can be confusing, especially with the variety of address types and the sometimes outdated or contradictory information available. In this guide, I’ll clarify the different types of Bitcoin addresses, which one you should follow, and demonstrate how to create a BTC address using Node.js.

We will concentrate on generating a BTC address offline, instead of utilizing Bitcoin Core. This is needed for creating a self-managed Bitcoin wallet, where you retain complete control over your private keys.

Different address types

First of all, let me explain the different kinds of Bitcoin addresses and their significance before we get into generating them. I am going to list the few main types of BTC addresses, not including the obsolete ones, ones with low adoption or being phased out, along with a sample of each on different networks.

Bitcoin addresses have different starting letters depending on if they’re for “mainnet”, “testnet”, or “regtest” networks due to the use of different network identifiers as a safety measure. This helps prevent mistakes, like using real Bitcoin addresses for testing, or vice versa, which could result in losing money.

P2PKH (Pay-to-Public-Key-Hash) Addresses:

This is the original Bitcoin address format, also called the legacy addresses. They start with the number ‘1’ on mainnet and with ‘m’ or ‘n’ on testnet or regtest network. P2PKH addresses do not support SegWit (what is Segwit?), which means slightly higher transaction fees as compared to the newer address types. While these addresses hold the most amount of BTC today, their adoption is decreasing.

Address Examples:
mainnet: 1FfmbHfnpaZjKFvyi1okTjJJusN455paPH
regtest: msiGFK1PjCk8E6FXeoGkQPTscmcpyBdkgS
testnet: mucFNhKMYoBQYUAEsrFVscQ1YaFQPekBpg

P2SH (Pay-to-Script-Hash) Addresses:

Introduced to simplify the use of complex scripts and to provide a layer of abstraction. They start with the number ‘3’ on mainnet and ‘2’ on testnet/regtest networks. P2SH addresses are commonly used for multisig wallets and were the first step toward the adoption of SegWit. Their adoption is also decreasing as they are replaced by newer types.

Address Examples:
mainnet: 3J98t1WpEZ73CNmQviecrnyiWrnqRhWNLy
regtest: 2NEb8N5B9jhPUCBchz16BB7bkJk8VCZQjf3
testnet: 2NFUBBRcTJbYc1D4HSCbJhKZp6YCV4PQFpQ

P2TR address (Taproot):

A pay-to-taproot (P2TR), also known as a Taproot or Bech32m address, is the most recent and advanced Bitcoin address format. Taproot introduces more advanced security, privacy, flexibility, and scaling to bitcoin. Like SegWit, Taproot addresses are opt-in currently but have very low adoption compared to SegWit. Taproot adoption can be tracked here.

Taproot addresses start with bc1p on mainnet, ‘bcrt’ on regtest and tb1 on testnet and are case-sensitive.

Address Examples:
mainnet: bc1p5d7rjq7g6rdk2yhzks9smlaqtedr4dekq08ge8ztwac72sfr9rusxg3297
regtest: bcrt1pema6mzjsr3849rg5e5ls9lfck46zc3muph65rmskt28ravzzzxwsz99c2q
testnet: tb1pzpelffrdh9ptpaqnurwx30dlewqv57rcxfeetp86hsssk30p4cws38tr9y

P2WPKH – Bech32 Addresses (SegWit):

This is considered the go-to format as of writing this article with their adoption increasing, introduced with Segregated Witness (SegWit) to address some deficiencies in the earlier address formats. They start with bc1q for mainnet, tb1 for testnet and ‘bcrt’ for regtest.

Bech32 addresses are lower-case only, which helps avoid errors caused by case insensitivity. They also allow for more efficient block space usage, leading to lower transaction fees.

You will see this address format in most wallets in the market today, including Trust Wallet and Exodus. The official Bitcoin core client has it as the default address type as well.

Address Examples:
mainnet: bc1qar0srrr7xfkvy5l643lydnw9re59gtzzwf5mdq
regtest: bcrt1q39c0vrwpgfjkhasu5mfke9wnym45nydfwaeems
testnet: tb1qxhkl607frtvjsy9nlyeg03lf6fsq947pl2pe82

There are a few more types of addresses not mentioned above as they are either phased out, being phased out, or, have a low adoption rate. For this article, I will focus on generating the P2WPKH Bech32 Addresses (SegWit) address as that’s the most popular standard today with an increasing adoption rate. You can learn more about each type of address here, including the adoption rate for each.

Generating the addresses

So with that out of the way, let’s generate our address, we will be generating a random address.

Start by installing the following NPM packages:

npm install bitcoinjs-lib tiny-secp256k1 ecpair

Next up, in your JS file, import these libraries and initialize ECPair:

const bitcoin = require("bitcoinjs-lib");
const ecc = require("tiny-secp256k1");
const { ECPairFactory } = require("ecpair");

const ECPair = ECPairFactory(ecc);

next, you have to define the network you want to generate the address for:

// for mainnet  
const network = bitcoin.networks.bitcoin;
// for testnet
const network = bitcoin.networks.testnet;
// for regtest
const network = bitcoin.networks.regtest;

next, we generate a random key pair, this is a very important part, you can read more about the importance of randomness here

const keyPair = ECPair.makeRandom();

The next part is the actual address generation, here’s how to generate a Bech32 (SegWit) address:

const p2wpkh = bitcoin.payments.p2wpkh({
    pubkey: keyPair.publicKey,
    network,
});
console.log("Address: ", p2wpkh.address);

Here’s how to get your private key (handle with utmost care):

const privateKey = keyPair.toWIF();

Security Consideration

It’s crucial to emphasize the security risks associated with handling private keys. Always ensure they are stored and used in a secure environment to prevent unauthorized access.

That’s it, you have got your address. For those interested in delving deeper into Bitcoin development, consider exploring the official Bitcoin documentation and community forums for advanced discussions and tutorials.

I am hoping this article helps someone out there just starting with Bitcoin development. Watch this space for more articles like this one. I am also going to be writing an article on how to generate a Hierarchical Deterministic seed phrase (aka BIP39 seed phrase) and use it to generate addresses for different blockchains using that seed phrase as most multi-currency wallets in the market do, such as Trust Wallet and Exodus.

Implement deep linking in React Native apps using Universal links and URL schema

Implementing deep linking is an important part of building an app with a good user experience, it can allow you to launch your app from other apps, open links in the app instead of browser for a better experience, etc.

There are two ways to implement deep linking, one is called “Universal links” in iOS or “App links” in Android, and the other type is called URL schema. Based on your use case you can choose to implement both or one of them, you can find the difference between the two here.

In this video tutorial, I will show you how to implement deep linking in both iOS and Android using both methods.

Project Files

https://github.com/saadibrahim/react-native-deep-links

Useful Links

7 awesome Visual Studio Code extensions to supercharge your React & React Native development

Visual Studio Code is the editor of choice for a lot of React & React Native developers including me, deservingly so, it’s an amazing editor with a great ecosystem of extensions. Here are some of the extensions I personally use and recommend:

Live Share

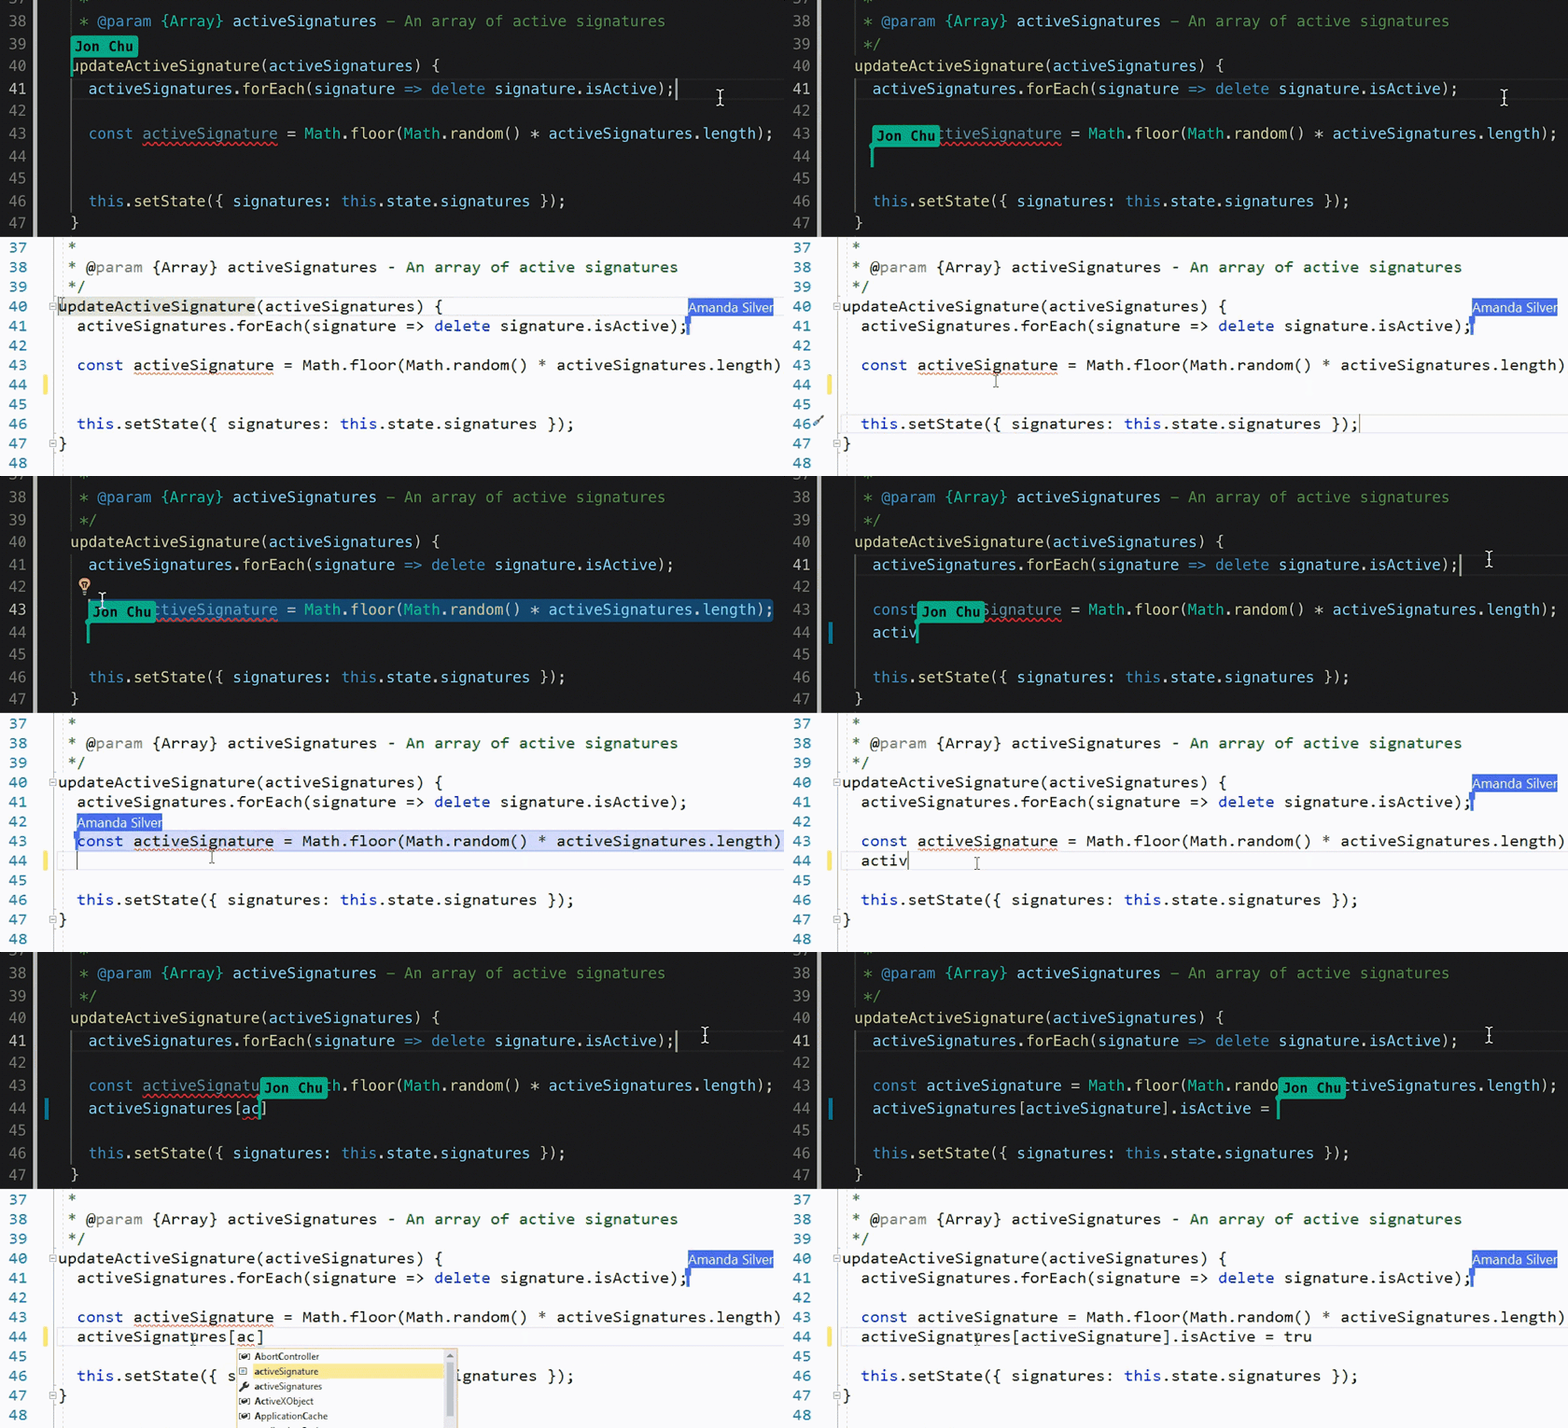
The first one is live share, this is very useful when working remotely, it allows you and your teammates to collaborate and code at the same time, this is really useful for that pesky bugs that you can’t wrap your head around. as they say, two heads are better than one!

Animated gif of 2 people highlighting editing code in real-time together.

Extension link

File Utils

File Utils is pretty simple, it provides a much better way to work with files, you can easily create, duplicate, move, rename, delete files and directories.

howto

Extension link

GitLens

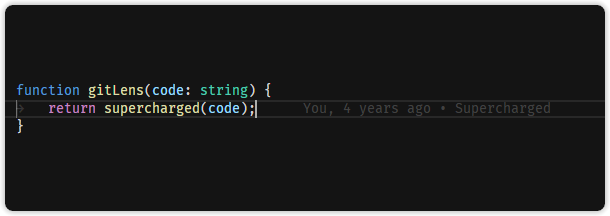
Gitlens adds a lot of Git capabilities to visual studio code, including my favorite git blame, which tells you who edited a piece of code last time so you can ask them for more context if needed or blame them for any mess-ups 😉 it also allows you to seamlessly navigate and explore Git repositories, adds powerful comparison commands, and so much more.

If you just want the git blame functionality, check out the appropriately titled Git Blame.

Current Line Blame

Extension link

Color Highlight

Color Highlight gives you a preview of any color written in your code, for example, if you write #FF0000, it will highlight that text in red color. It’s pretty nifty and works with React Native styles too in addition to CSS, SASS, etc.

Extension link

Code Spell Checker

This one does what it says, checks your code for spelling errors, it even supports camelCase. it adds a little more polish to your code and helps you avoid silly mistakes due to wrong variable names.

Example

Extension link

Markdown Preview Enhanced

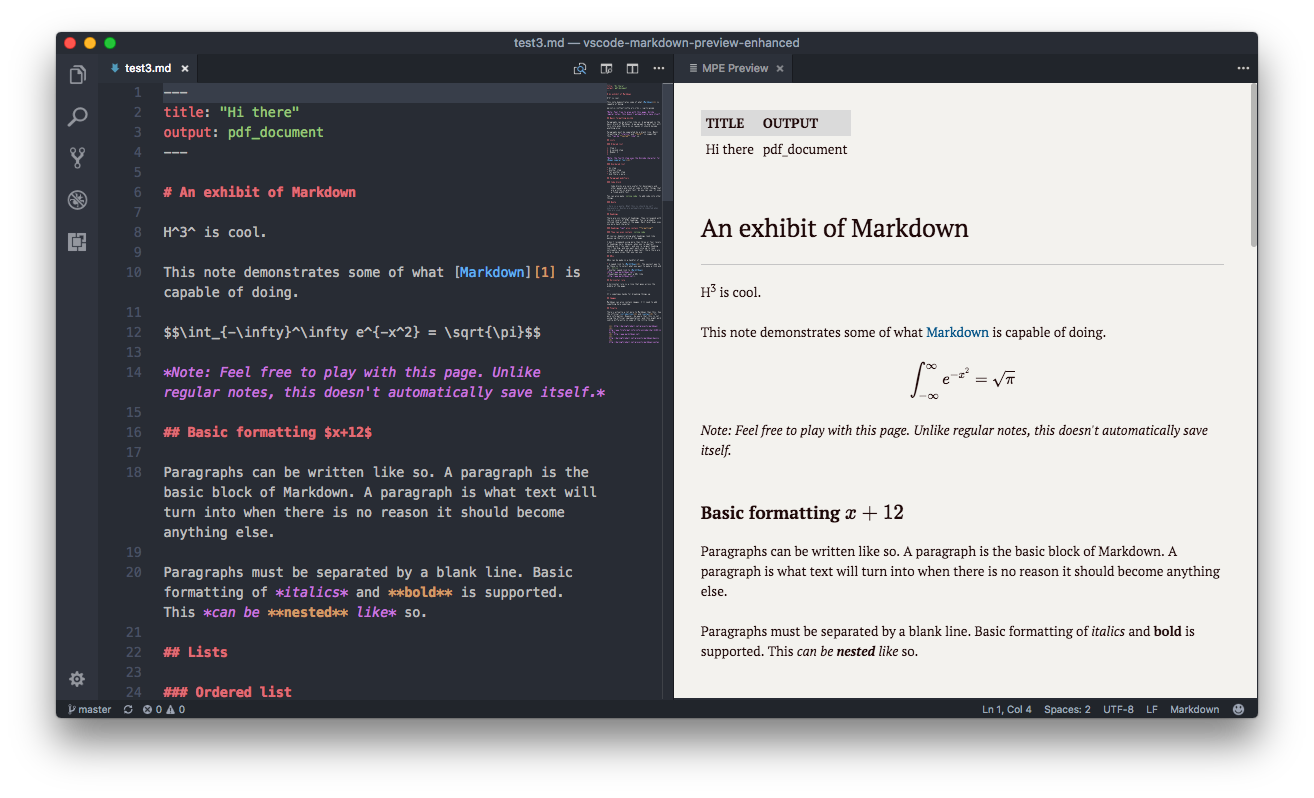
Very useful to write readmes for GitHub and for writing documentation, shows a preview for your markdown on the right. way better than browser-based online tools

intro

Extension link

Bracket Pair Colorizer

This is pretty nifty as well, it basically makes it easy to differentiate between different blocks of code by changing the color of each pair of opening and closing brackets.

Screenshot

Extension link

How to share code between React and React Native app using React Native Web and Yarn Workspaces

When I started at my current company we had to release an MVP for iOS, Android and Web in under three months. For iOS and Android ofcourse we went with React Native and in order to move fast I decided for the web app I will use React and share as much code as possible between the two using a monorepo system.

I decided to use react-native-web which allowed us to share UI code between the two as well and subsequently share more than 90% of the code. This approach allowed us to save a lot of development time which would be spent on coding a separate web app.

I will show you in this tutorial how you can do that.

Project Files

https://github.com/saadibrahim/universal-react-app

Useful Links

Screenshot

6 super useful libraries for React and React Native

I have been working with React and React Native for more than 4 years now and today I am going to share with you some great libraries that I find myself using again and again in my projects. Here they are:

Reselect

Reselect is a simple “selector” library for Redux allowing you to create memoized selectors, from their description:

  • Selectors can compute derived data, allowing Redux to store the minimal possible state.
  • Selectors are efficient. A selector is not recomputed unless one of its arguments changes.
  • Selectors are composable. They can be used as input to other selectors.

Apisauce

Apisauce is basically a wrapper over Axios, it adds standardized errors and request/response transforms to the API response. It also allows you to add monitors that you can use to record values, measure performance of API calls, perform logging, etc.

I personally use monitors for printing API responses to console in development and log/monitor our API failures.

It also allows you to add request transforms, which you can use to add user language in the headers of each API call for example.

Immer

Immer makes it easy to write reducers and makes it easy to work with immutable state, from their documentation:

Using Immer is like having a personal assistant; he takes a letter (the current state) and gives you a copy (draft) to jot changes onto. Once you are done, the assistant will take your draft and produce the real immutable, final letter for you (the next state).

Before Immer:


const byId = (state, action) => {
switch (action.type) {
case RECEIVE_PRODUCTS:
return {
…state,
…action.products.reduce((obj, product) => {
obj[product.id] = product
return obj
}, {})
}
default:
return state
}
}

After Immer your code simply becomes:


import produce from "immer"

const byId = produce((draft, action) => {
     switch (action.type) {
         case RECEIVE_PRODUCTS:
             action.products.forEach(product => {
                 draft[product.id] = product
             })
     }
 })

No more spread operator hell!

react-i18next

react-i18next is, in my opinion, the best i18n library for React, which is a React wrapper for i18n, you can use it with both React and React Native, and it’s very powerful, it has everything you would need for having a multi-language app including functionalities like plurals, formatting, interpolation.

Redux persist

Redux persist basically allows you to save i.e persist your redux state to the device local storage so you can make sure the user retains their logged-in state and data between sessions.

While you could implement your own solution, Redux persist just handles a bunch of things out of the box, it warns you if the older data on the device doesn’t match with your new state after an upgrade, gives you helpers to migrate state if you have made massive changes to your state in a version upgrade, it allows you to select what to persist, how to merge the old state from the device and your application, what storage engine to use i.e async storage in react native and local storage in react js, etc. its really powerful.

React Hook Form

React Hook Form is the best form library for ReactJS, it helps you handle form validation among other things and it is really fast! it’s easy to use, works with both React JS and React Native and has a form builder that makes it easy to generate forms. It comes with really good documentation as well.

Styled Components

styled-components is my go-to library for handling styles in my react apps, I enjoy working with it because it allows me to write actual CSS in JS including things like media queries, do nesting, and a lot more things, it’s awesome and really powerful, and also works with React Native.

Are there any libraries that you like to use in your projects often, please comment below!

Add internationalization and right to left layout support to your React Native app using react-i18next

Internationalization is an important part of an app especially if you are targeting multiple countries or countries that speak multiple languages.

Here’s video a tutorial I have made that shows you how to add react-i18next to your react native app to add translations, how to switch the language, and most importantly how to handle Right to Left layouts for languages like Arabic, Urdu, Farsi, Hebrew, etc.

Project Files

https://github.com/saadibrahim/react-native-rtl-tutorial

Useful Links

Screenshots

iOS
Android

How to serve your React App’s JS and CSS files from a CDN

If you are looking on how to serve your React App that is bootstrapped with create-react-app from a CDN for better performance, I will show you how.

After creating a build, if you check the index.html file inside your build folder you will see that that its referencing all the assets from the static folder:

<script src="/static/js/main.560a2161.chunk.js"></script>

Now let’s add an environment variable which will make our app use our CDN url as the base URL, there are couple of ways to do so.

Either you can create an .env file in your project root and add a PUBLIC_URL property to it, like this:

PUBLIC_URL=https://cdn.something.com 

Or you can set the PUBLIC_URL when building the project, in this manner:

PUBLIC_URL=https://cdn.something.com yarn build

Now when run the build and check the generated index.html inside the build folder, you will see that it has automatically updated to reference the assets from your CDN url:

<script src="https://cdn.something.com/static/js/main.00d4ef19.chunk.js"></script>

You can now host the static folder on your CDN and your assets will be loaded from there.

Hope you found this tip helpful.

Tips for people working from home during the lockdown

With COVID 19 wreaking havoc on the social order, a lot more people are working from home. While not having to commute to work and working in your PJs may sound great, it is not always easy.

As someone who has worked remotely for a significant chunk of my career, it took me a lot of trial and error to get good at it. Below are some tips that help me stay productive, and avoid burnout, while working from home.

Have a routine

It is tempting to wake up and start working from bed (Trust me, I know), but it is very important to maintain a good routine. Get out of bed, shower, get dressed (even if it is your PJs) and have a healthy breakfast before you start your work day.

It is ideal to have consistent set of hours to work. Its best to follow your regular 9-5, even if your company doesn’t require it and make sure you take a midday break for lunch so it keeps you fresh and motivated for the rest of the day.

Do not let your work spill over to the next day, especially over to weekends even if your company allows it. That’s an easy way to feel like you never get a break, and get burnt out.

Know when to switch it off

It is easy to get carried away and keep working beyond your usual hours, especially if you are stuck at a problem, but it’s important to remember to switch off.

You are less likely to fix the issue at hand because you are already drained, and if you keep working late, you won’t be fresh the next day. Instead, stop working when your hours are up, have a relaxing evening and come back at it fresh the next morning.

Block distractions

Try to minimize distractions as much as possible. For digital distractions, I use a Google Chrome extension called block site, which basically does what it says. You can define a list of websites that you want to block while working e.g Youtube, Reddit, Facebook, etc, and it will not let you open those sites.

On the other hand, eliminating offline distractions is a bit more difficult, but not impossible. While having a separate office in your house is not always possible, I recommend keeping your desk in an isolated area in the house, away from everyone.

Using noise isolating headphones is an easy way to block out sounds or voices of family members talking so you don’t get distracted by them. There have been studies that prove that if you hear someone you know talking, you are more likely to get distracted.

Get Comfortable, but not too comfortable

Being comfortable is important, but there is a difference between being comfortable enough to work, and comfortable enough to fall asleep. Make sure it’s not the latter. Have a nice, ergonomic desk and a chair with great back support, and avoid working from your bed at all costs, that is a recipe for disaster and can also affect your sleep pattern.

Stay organized

Create a to-do list for your tasks, apart from your project management software, to breakdown the task into smaller chunks. It helps you stay focused, and it’s very satisfying to tick off the boxes as you get done with things.

Additionally, you can use something like Pomodoro timer to help boost your productivity.

And for the sake of your sanity, keep a clean desk. It’s easy to get messy because no one is watching.

Communicate more

At an office, communicating is easy because you can do it face to face, that is why having good communication skills become even more important when you’re working remotely. My favorite tool to stay in touch with my team is Slack. Use it when you have complex questions that can not be answered through text. I encourage calls among my team, even if it is a 5 minute quick call. A 5 minute call can be way more effective than typing for half an hour.

I hope these tips are helpful. Feel free to share tips that work for you in the comments, I’d love to read them!

Stay safe!

How to fix SDK location not found error when running “react-native run-android”

Welcome to “Troubleshooting React Native” series. I am writing this series for React Native beginners to provide simple solutions to common frustrating problems. With React Native you dont just have to deal with Javascript errors but also errors related to native Android and iOS build tools.

The error I am showing you now can be a real bummer since it is one of the first errors you might face when trying to setup React Native for Android development. The error usually says the following:


FAILURE: Build failed with an exception.

* What went wrong:
A problem occurred configuring project ':app'.
> SDK location not found. Define location with sdk.dir in the local.properties file or with an ANDROID_HOME environment variable.

* Try:
Run with --stacktrace option to get the stack trace. Run with --info or --debug option to get more log output.

BUILD FAILED

Total time: 8.082 secs
Could not install the app on the device, read the error above for details.
Make sure you have an Android emulator running or a device connected and have set up your Android development environment:
https://facebook.github.io/react-native/docs/android-setup.html

This one is pretty easy to solve, but it can be intimidating to see an error like this when you are just starting out.

The error that we see here is that React Native CLI isn’t able to locate the Android SDK, so we have to just tell it where to find it. To do that you need to do the following steps:

  • Open your React Native app directory.
  • Navigate to your-app/android/
  • Create a simple text file and call it local.properties
  • Add the following code to this file (Don’t forget to replace “your-username” with your actual username.):
sdk.dir = /Users/your-username/Library/Android/sdk
  • That’s it! run “react-native run-android” command again or use Android Studio to run the project.

I am hoping this helps someone out there just starting out with React Native. Watch this space for more articles like this one.

5 very useful open source React Native components

One of the best things about React Native is that it’s not even that old yet it has so many open source components and libraries you can use in your projects, here are 5 of the most useful ones that I have used in my projects and found very useful:

Airbnb React Native Maps

When I started using Airbnb maps for my project it was the only complete maps library for React Native out there, made by none other than Airbnb for thier own React Native app. Later on React Native team decided to make it the official map solution for React Native and I agree with thier decision. It’s a pretty awesome and robust solution to your mapping needs, I have used it for a directory app with great success and found it to be very performant as well.

https://github.com/airbnb/react-native-maps/

React Native Swiper

This is probably one of the most commonly used one in my apps. You can use it create photo galleries and app intros. Simple and performant!

https://github.com/leecade/react-native-swiper

React Native Blur

Blur effects are a big part of iOS design language so it makes sense that you would want to use them in your Apps as well, this component allows you to implement blur effect in your apps with ease.

https://github.com/react-native-community/react-native-blur

React Native Linear Gradient

Another component to help you make your app look pretty. Quite simple, does what it says.

https://github.com/react-native-community/react-native-linear-gradient

React Native Lazy Load

This component can be really important for user experience if you have many images in a single view, you don’t want to load a lot of images at once especially on a mobile phones with limited and/or slow data packages. Apart from images it also allows you to lazy load views. I recently worked on a project where we had to make an API request only when the user had scrolled to the component, I ended up using an invisible Lazy Load view component to trigger the API request.

https://github.com/magicismight/react-native-lazyload

React Native Vector Icons

This is one of the best libraries out there. you can use it to add font icons to your projects easily, it comes pre bundled with some of the free ones like FontAwesome but you can also generate icons from custom font icons downloaded from places such as FlatIcon, very handy.

https://github.com/oblador/react-native-vector-icons

Hopefully some of you find these useful. I plan on making more such posts in the future so watch this space.